I’ve been experimenting with AI tools recently, and I discovered one that delivers impressive results. You’ve probably seen those striking digital portraits flooding your social media feeds—the ones featuring crisp lines, vibrant colors, and that polished vector art aesthetic? You can actually create them yourself in minutes.
A quality digital portrait goes beyond simple photo filters. It’s an artistic reinterpretation of your image, characterized by precise edges and deliberate color selections. Imagine a contemporary artist rendering your likeness with absolute accuracy.
The most successful portraits share several key characteristics: they employ flat, uniform colors rather than gradients; they feature intentional, dramatic lighting; they maintain tight, focused compositions; and crucially, they preserve your recognizable features while adding an artistic flair.
Google offers an image generation model integrated into Gemini that excels at both editing and creating images from text prompts.
After testing numerous AI image tools, this one distinguishes itself through its responsiveness to detailed instructions. You can specify precise requirements—viewing angles, color palettes, lighting conditions, and artistic styles—and consistently receive accurate results.
The major advantage? No downloads or subscription fees required. Simply navigate to gemini.google.com to begin.
Creating Your Digital Portrait
Here’s the process that works:
Launch a new conversation in Gemini, select the attachment icon, and upload a high-resolution photo of yourself. Ensure you’re using a sharp image with clear facial visibility.
Then paste this prompt:
Create a sharply focused portrait that fills the frame, keeping the face identical to the reference shape. Use a clean vector look with bold, flat color sections. Show the person from a side view facing toward the right, maintaining a firm and composed expression. They wear small round black sunglasses lowered slightly so one eye is visible. The clothing should be a deep forest green or teal jacket with a raised collar. Use bright front-right lighting to cast crisp shadows and make the features stand out. Set the background to a rich burgundy red. Produce the image in a vertical layout with very high clarity and precise edges.
Hit send and wait about 10 seconds. Gemini will generate a stylized version of your photo.
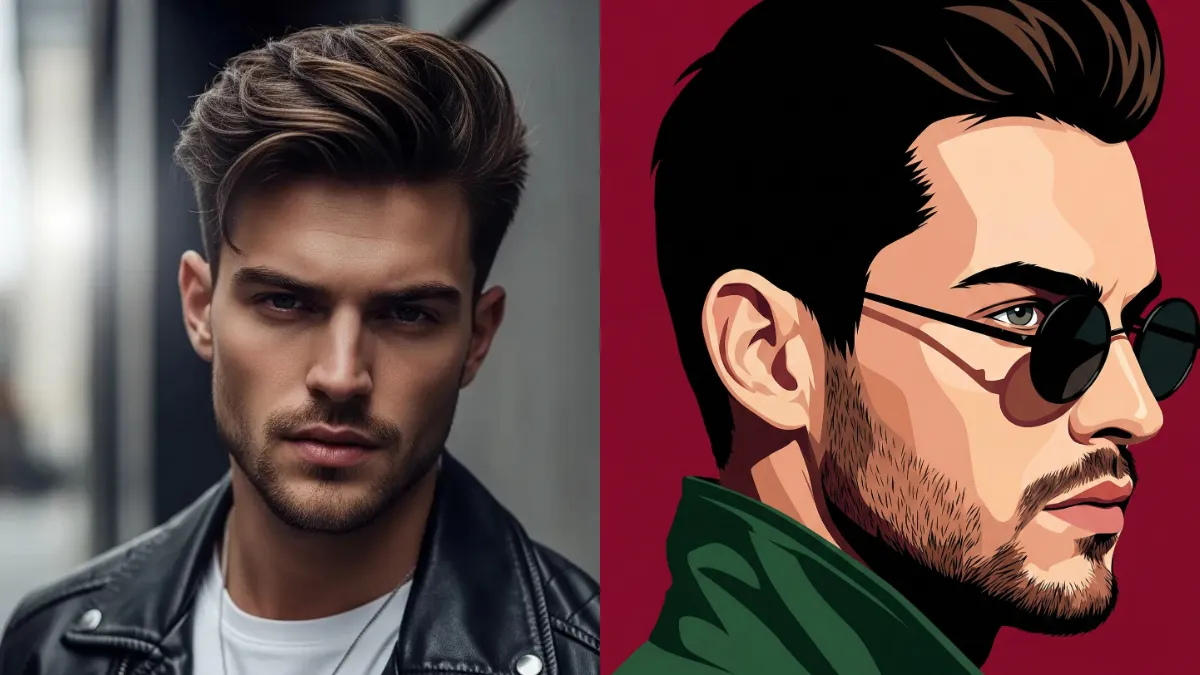
I tested this with two different photos. First, I used a picture of a man.

 How to Turn Your Photo into 3D Character Using Gemini Nano Banana Pro
The output turned him into this sharp looking portrait with the teal jacket and burgundy background. The side profile gave it a classic feel, almost like something you’d see in a graphic novel.

 31 Art Styles for ChatGPT Image Generation
Then I tried it with a woman’s photo. Same prompt, completely different person, but equally impressive results.

 How to Create Cute Halloween Characters Using Meta AI
The round sunglasses, the bold colors, the clean lines, it all came together perfectly. Her features stayed recognizable, but the style was completely fresh.

 How to Create Quirky Cartoon Characters Using Gemini
Both portraits had that premium, designed look. Like something you’d pay a professional illustrator to create.
Understanding the Prompt Components
Let me break down each element so you can customize it for your preferences.
“Sharply focused portrait that fills the frame” – Ensures your face dominates the composition, eliminating unnecessary negative space or background clutter.
“Keeping the face identical to the reference shape” – Critical instruction that preserves your actual facial structure rather than generating a generic approximation.
“Clean vector look with bold, flat color sections” – Produces the contemporary, illustration-style aesthetic by avoiding messy gradients or photorealistic textures.
“Side view facing toward the right” – Adjustable to “left” or “front view” based on preference. Side angles typically yield more artistic results.
“Firm and composed expression” – Maintains a professional, confident mood. Alternative options include “smiling warmly” or “looking thoughtful” to match your desired tone.
“Small round black sunglasses lowered slightly so one eye is visible” – Adds distinctive character. Remove entirely for a clean look, or modify to “aviator sunglasses” or “cat-eye frames.”
“Deep forest green or teal jacket with a raised collar” – Clothing significantly impacts the overall aesthetic. Experiment with “burgundy blazer,” “black leather jacket,” or “white turtleneck.”
“Bright front-right lighting to cast crisp shadows” – Creates visual impact through dramatic contrast that emphasizes facial features. Try “soft even lighting” for a subtler approach.
“Rich burgundy red background” – Background color establishes mood: navy blue conveys professionalism, mustard yellow suggests vintage vibes, soft pink radiates approachability. Select what aligns with your personality.
“Vertical layout with very high clarity and precise edges” – Delivers a portrait-oriented image with sharp definition, ideal for profile pictures or prints.
Optimization Strategies
- Begin with a clear, properly lit source photo. Low-quality or poorly exposed images lack sufficient detail for accurate processing.
- Iterate if initial results disappoint. Simple adjustments like “darken the jacket” or “switch to a blue background” typically work.
- Mix elements freely. Want sunglasses without the profile view? Modify the prompt accordingly. Prefer different colors? Change those specific terms.
- Specificity directly correlates with output quality.
Final Thoughts
I didn’t anticipate a free tool delivering results of this caliber. Yet Google’s Imagen model through Gemini genuinely produces professional-grade digital portraits in seconds.
Success depends on prompt specificity and starting with a quality photograph. From there, refinement is simply a matter of iterative adjustments until you achieve your ideal result.
Try it yourself. Upload a photo, input the prompt, and evaluate the outcome. You may be pleasantly surprised by the quality of your stylized digital portrait.